Home
>
Handibot Forum
>
Topic
Handibot 1.1 progress
Posted by Brian Owen, ShopBot
|
Handibot 1.1 progress February 26, 2015 09:20AM | Admin Posts: 622 |
Here at Handibot HQ in Durham, we've once again been buried under a pile of soggy snow that's keeping us out of the shop for at least another day. However, in between storms we've been managing to gear up for the release of handibot 1.1; which, you'll recall, includes a redesigned front for easy access to the router, backing plates to help align the y-axis, and new limit switches--Ted discussed it in our January development report.
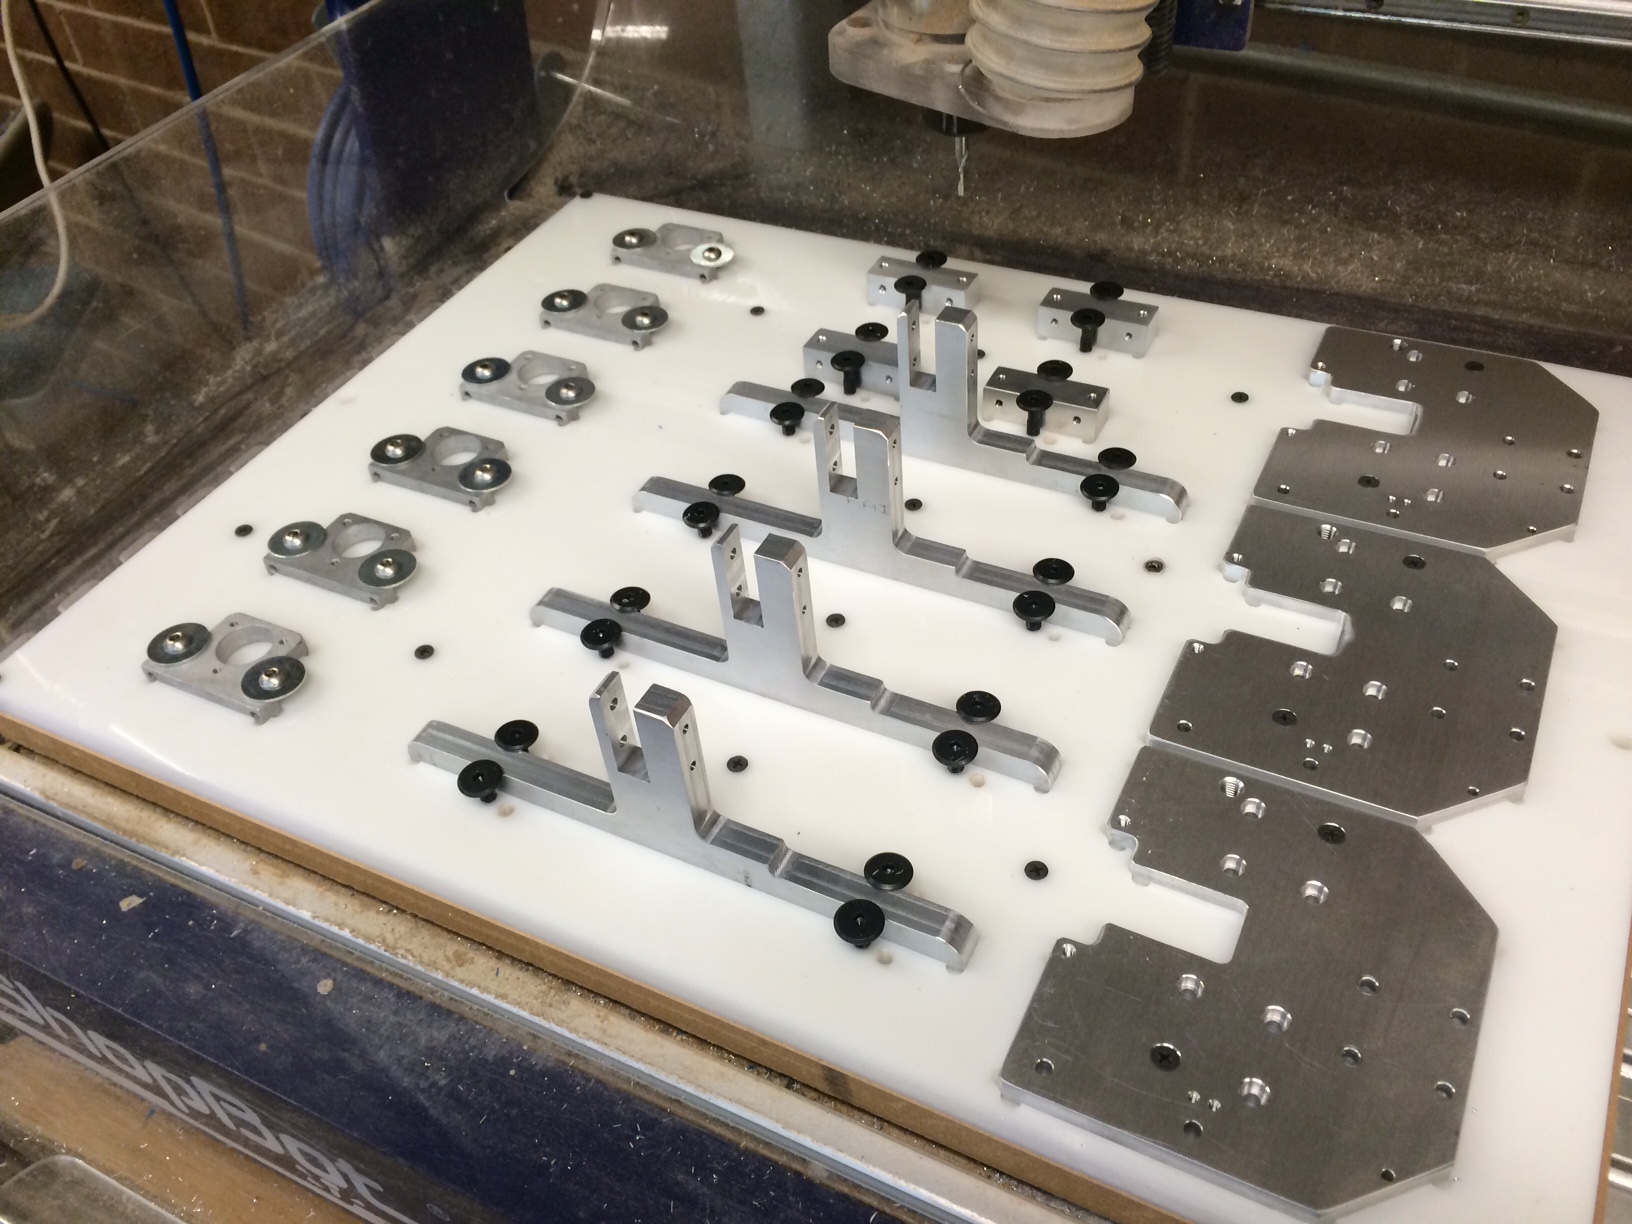
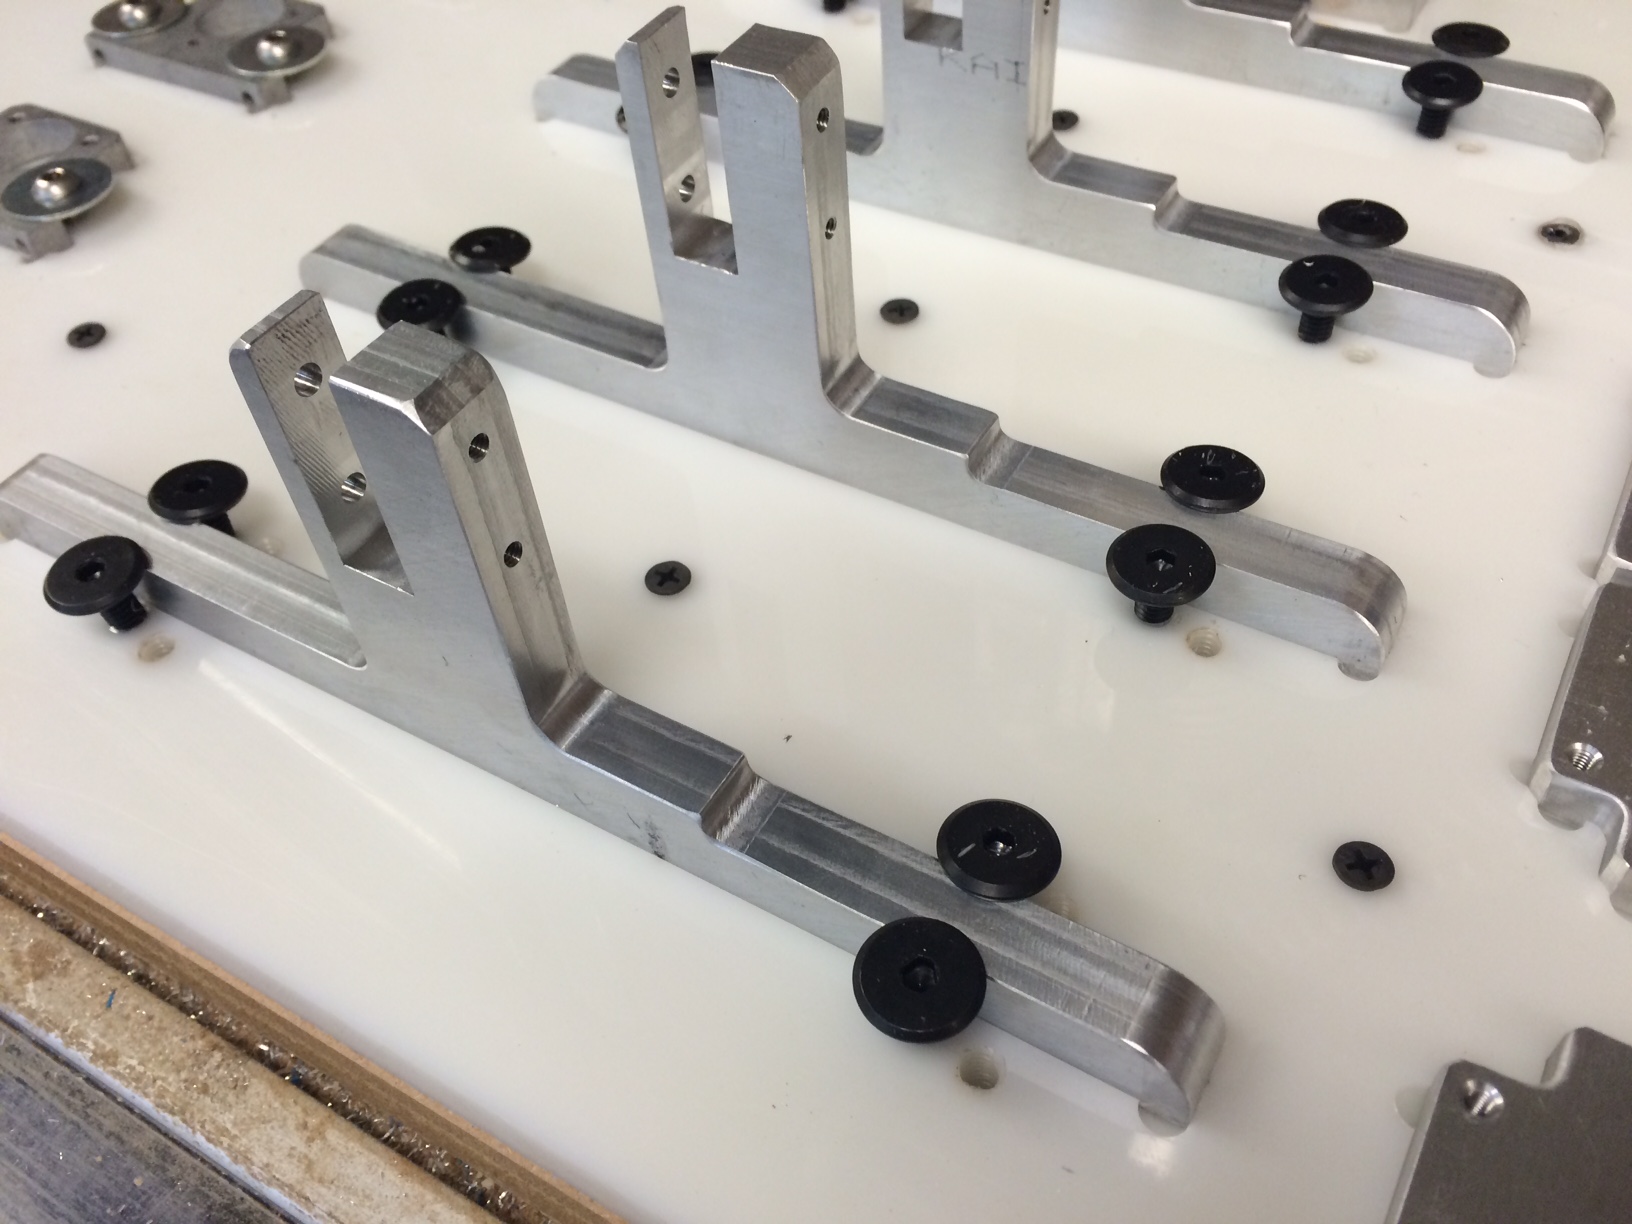
One of the steps to making this change happen is that we needed to modify a lot of the aluminum parts that go into a handibot in order to accommodate the new limit switches. We had considered sending them out to a machinist, but I thought it would be fun to create a jig to modify the parts in batches. I thought you all might be interested to see how the jig worked out; I've attached a few photos of the setup. We had about 60 of each part to modify--with the cut file taking 5 minutes for each batch we knocked it out in just a couple of hours with our intern Fred Lastpowell standing by and feeding the machine.
This week, I've also been getting our new vacuum jigs set up on our two production desktop tools to produce the new plastic handibot 1.1 parts. These tools now have a secondary cutting head that allows us to complete all of our parts without having to stop for tool changes. I'll get some pictures of it in action when I get out from under this snow and back into the shop--soon hopefully!
|
Re: Handibot 1.1 progress March 03, 2015 04:17PM | Posts: 1 |
|
Re: Handibot 1.1 progress March 06, 2015 07:21PM | Posts: 20 |
Hi Handibot.
Wanted to say 'thanks' and 'wow' with the info in the Jan update.
Looks like you guys are looking at ways to implement a lot of the ideas that were thrown about in the app brainstorming exersize.
Really interested to see what happens with extended capabilities like the 3d printing head. Hybrid add/sub systems are popping up all over the place.
Interested to see if things like printing a biscuit joint could be possible?
EG: route out the holes joints, print in the biscuit, then assemble.

Or how about drill out a depression and print in feet directly on the piece?
Currently when assembling kitchen cabinets, the customer must screw in feet or shelf rests. What if they were built into the wood sections?

Guides and stops could be printed onto sections, and scraped off, or dissolved with water.
Edited 1 time(s). Last edit at 03/13/2015 06:43PM by Dave T.
Wanted to say 'thanks' and 'wow' with the info in the Jan update.
Looks like you guys are looking at ways to implement a lot of the ideas that were thrown about in the app brainstorming exersize.
Really interested to see what happens with extended capabilities like the 3d printing head. Hybrid add/sub systems are popping up all over the place.
Interested to see if things like printing a biscuit joint could be possible?
EG: route out the holes joints, print in the biscuit, then assemble.
Or how about drill out a depression and print in feet directly on the piece?
Currently when assembling kitchen cabinets, the customer must screw in feet or shelf rests. What if they were built into the wood sections?
Guides and stops could be printed onto sections, and scraped off, or dissolved with water.
Edited 1 time(s). Last edit at 03/13/2015 06:43PM by Dave T.
|
Re: Handibot 1.1 progress March 06, 2015 08:06PM | Posts: 20 |
|
Re: Handibot 1.1 progress March 12, 2015 05:14PM | Admin Posts: 622 |
Dave,
That additive/subtractive crawler sounds interesting! One of the things we've tried looking into in the past is a series additive then subtractive tool. By this I mean that the tool would squirt some fast curing material onto a substrate--it would build up the rough shape of the part rapidly without much concern for the "bead" size of the print head. It would then switch over to a traditional router bit and machine the part down to the exact shape desired. This would be a way to save money on materials and open the possibility of making parts out of multiple materials.
That additive/subtractive crawler sounds interesting! One of the things we've tried looking into in the past is a series additive then subtractive tool. By this I mean that the tool would squirt some fast curing material onto a substrate--it would build up the rough shape of the part rapidly without much concern for the "bead" size of the print head. It would then switch over to a traditional router bit and machine the part down to the exact shape desired. This would be a way to save money on materials and open the possibility of making parts out of multiple materials.
|
Re: Handibot 1.1 progress March 13, 2015 11:21AM | Admin Posts: 71 |
Hi Dave,
Yep ... we are really interested in combined additive and subtractive, whether on Handibots or larger tools. We keep looking out for the "killer" app that will really highlight the utility of the capability.
Meanwhile on the topic of the new "crawler" ... we're using it for production of the HDPE parts for the new "Handibot Hood" which should have been up in the store last week but got delayed a bit by weather and fussing with production. As soon as we get it in the store and the files posted, I'll try and get some video up of the production process and how we're using the "crawler" (which itself will be along shortly) ...
Ted Hall, ShopBot Tools
|
Re: Handibot 1.1 progress March 13, 2015 04:58PM | Posts: 20 |
Just wanted to add a couple of links to things that could be associated with some of the ideas tabled...
Ikea have been working with novel geometries to facilitate tooless construction of their products. Handibot could do something similar but 3d print in the dowel sections...
[www.core77.com]
And it's now possible to source 3d printer filiment made with wood particles...
[www.makergeeks.com]
So one could argue that the final peice is still wood construction
|
Re: Handibot 1.1 progress March 13, 2015 05:09PM | Posts: 20 |
On the subject of jigs (I think that's the spelling)
Currently if one wants to go into productions, one builds a series of jigs to line up components and speed assembly.
What if these guides were printed onto the components and then removed (by snapping, scraping, or dissolving)?
Edited 1 time(s). Last edit at 03/13/2015 08:44PM by Dave T.
Currently if one wants to go into productions, one builds a series of jigs to line up components and speed assembly.
What if these guides were printed onto the components and then removed (by snapping, scraping, or dissolving)?
Edited 1 time(s). Last edit at 03/13/2015 08:44PM by Dave T.
|
Re: Handibot 1.1 progress March 13, 2015 06:41PM | Posts: 20 |
|
Re: Handibot 1.1 progress March 13, 2015 08:10PM | Posts: 20 |
Something else that could be fun.
I was thinking about using the handibot to apply glue, which got me thinking about PVA.
Then I was thinking about how I used to paint my hand as a kid and the glue peeled off like a second skin.
Use the 3d printer to print a plastic design onto the wood surface.
Stain or varnish the wood, painting over the plastic design.
Peel off the plastic and repeat the stain for a two-toned stained design.
If you peeled off just a section of the plastic print, and applied stain, it would be possible to have three or more levels of tone.
|
Re: Handibot 1.1 progress March 13, 2015 08:23PM | Posts: 20 |
Handles could be printed directly onto the wood...

Dave T Wrote:
> Or how about drill out a depression and print in
> feet directly on the piece?
> Currently when assembling kitchen cabinets, the
> customer must screw in feet or shelf rests. What
> if they were built into the wood sections?
>
>
>
Dave T Wrote:
> Or how about drill out a depression and print in
> feet directly on the piece?
> Currently when assembling kitchen cabinets, the
> customer must screw in feet or shelf rests. What
> if they were built into the wood sections?
>
>
>
|
Re: Handibot 1.1 progress March 20, 2015 02:56AM | Posts: 453 |
When I first saw the rotary axis, I was giddy but now that I know you are actively working on the crawler I think, in practical terms, I am more excited by it.
This will be a major step toward full hobby usability. I think with the laser, the large area jig, a joinery jig, and the crawler I will be able to do 99% of the cuts I want to do.
Do you have a price estimate for the crawler?
Do you have updated release dates for the rotary axis and the crawler now that the last estimate has passed?
Thanx
|
Re: Handibot 1.1 progress March 23, 2015 09:36AM | Admin Posts: 622 |
Mark,
I'm also excited about the crawler! Ted and I have been trying to knock out these projects and catch up with the schedule that we projected at the start of the year. One of the things that has come up as we've been wrapping up our designs and manufacturing procedures is the need for good documentation standards. One of the fun things about handibot right now is that everyone on the project can pretty much recall each change and upgrade in the life-time of the product--this lets us act relatively quickly on design changes. However, we're trying to lay a good foundation with our documentation. I wrote a bit about our efforts to keep our work tidy in the development team update for this month: [handibot.com]
Brian
Sorry, only registered users may post in this forum.