Doing Art with Handibot
by Ted Hall • August 26, 2015 • News, Projects
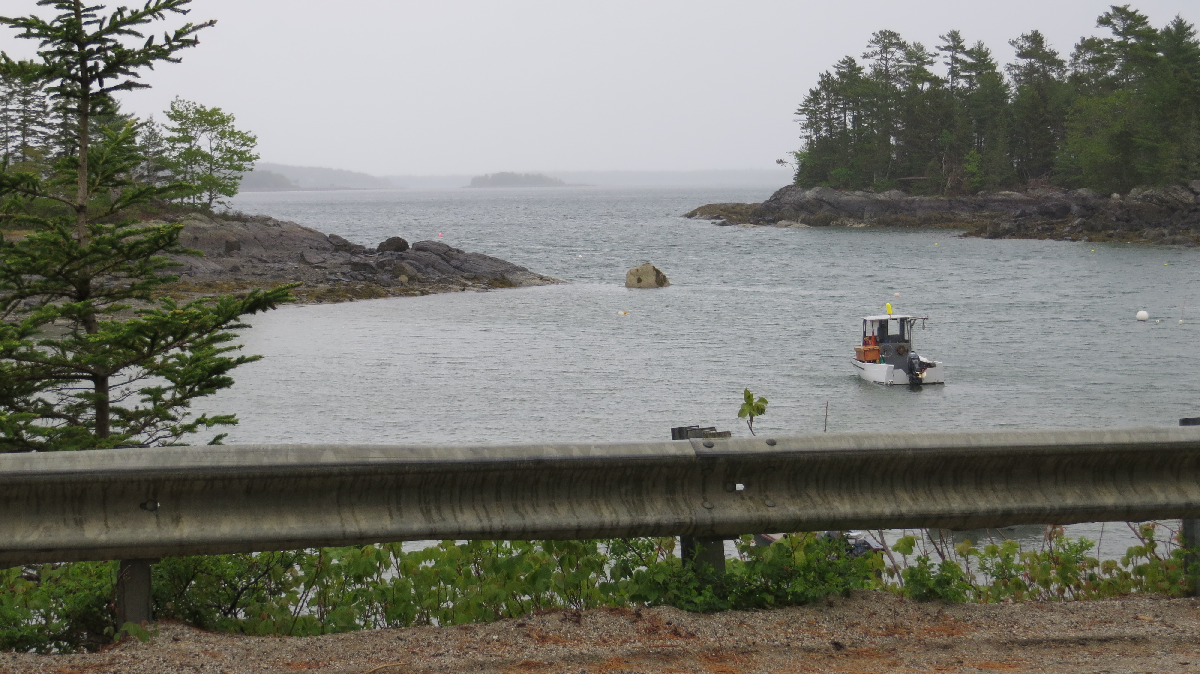
Scenic Maine Coast near Haystack Mountain Craft School
Five years ago, I tried to take some time off from ShopBot and use the time to indulge in several of my favorite pursuits: boating, painting, and digital-fabbing. I was hoping to combine drawings and photographs of water scenes done from my kayak into a type of art I think of as “bas-relief, painted carving.” I have always loved the look of well-painted, carved, signs – and wanted to use that look as the basis for a sort of digital art form, with loosely, semi-abstracted water views as my subject. I know that sounds a little vague… but I’m about to illustrate what I mean and how I went about doing this type of art with a Handibot.
First, I have to admit that I did not get very far when I attempted to do this kind of digital art previously. I managed to take a week off and made a bit of progress that I reported on, but soon found myself drawn back to things at ShopBot (see previous project). And, truth be told, I’ve only gotten a little further this second time.
But this time around, I was invited to spend two weeks in what is called a “Residency” program at the Haystack Mountain School of Crafts on Deer Isle in Maine. A group of 30 artists are given the run of the spectacular Haystack campus and studios on the Maine coast – basically encouraged to do whatever appeals to them for two weeks. Definitely an amazing setting and experience of place and people. Everyday I was amazed at the creative energy and wide-ranging interests of the artists I was hanging out with.
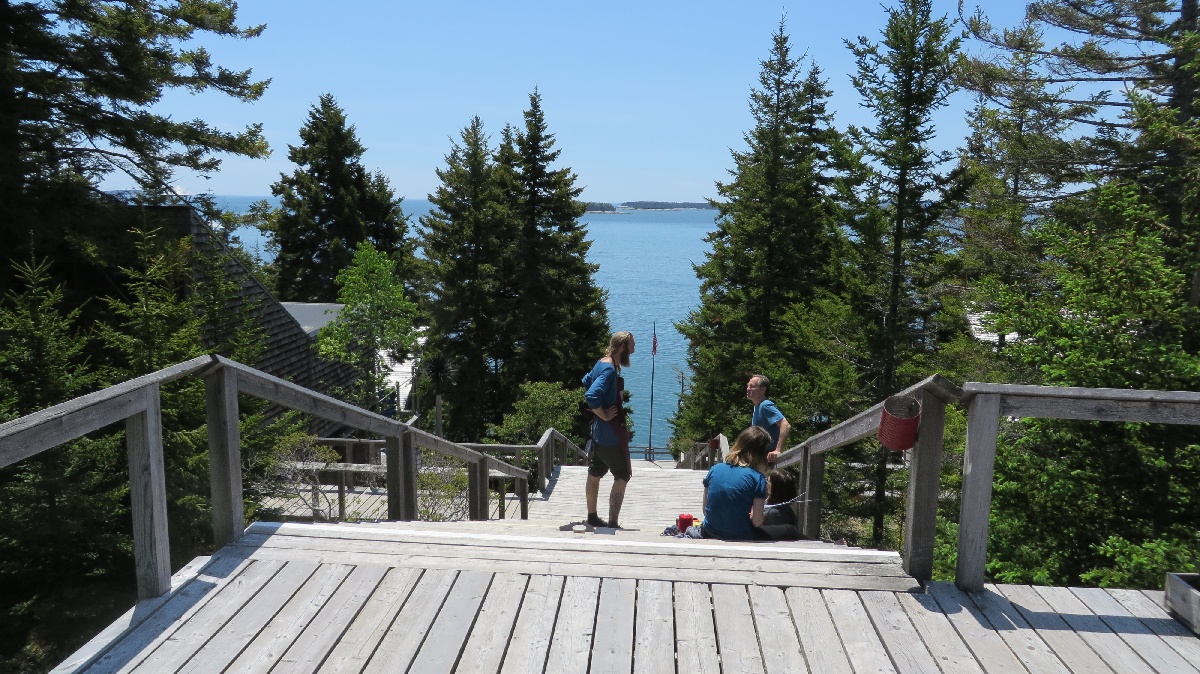
Looking out from the main staircase at Haystack (studios and workshops on each side of stairs)
Of course, I was not really one of the creative crowd, I was one of a couple of non-artists invited to “broaden the conversation” at Haystack, it being a pretty open-minded place. But figuring I’d be away from civilization at this place in the woods of Maine for two weeks – pretty much out of contact with ShopBot – I thought that maybe I could make a little progress on my own painted-bas-relief-waterscape-art-project…
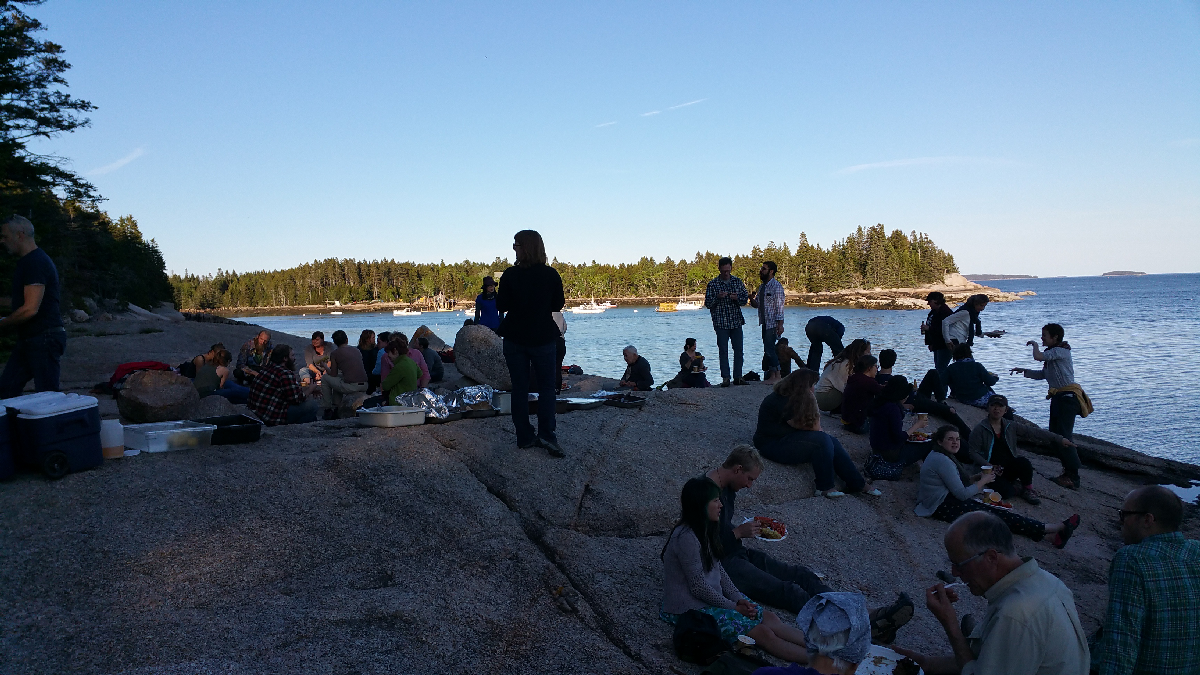
Lobster bake with artists and craftspeople on the beach at Haystack
In the spirit of full disclosure, as one of its studios, Haystack has an MIT sponsored FabLab which contains 2 ShopBots… so I suppose that part of my mission at Haystack could have been viewed as helping participants make sense of new, digital fab technologies and how these technologies might be incorporated into their own work. But it turns out that there is already a strong appreciation of digital technologies in art, design, and creative work these days; many of the participants were already using – or had ideas for using – CNC in their work. In addition, the FabLab already had a very helpful and expert crew… meaning I could focus on my own project. So I indulged in spreading out my tools, material, and Handibot in the woodworking studio.
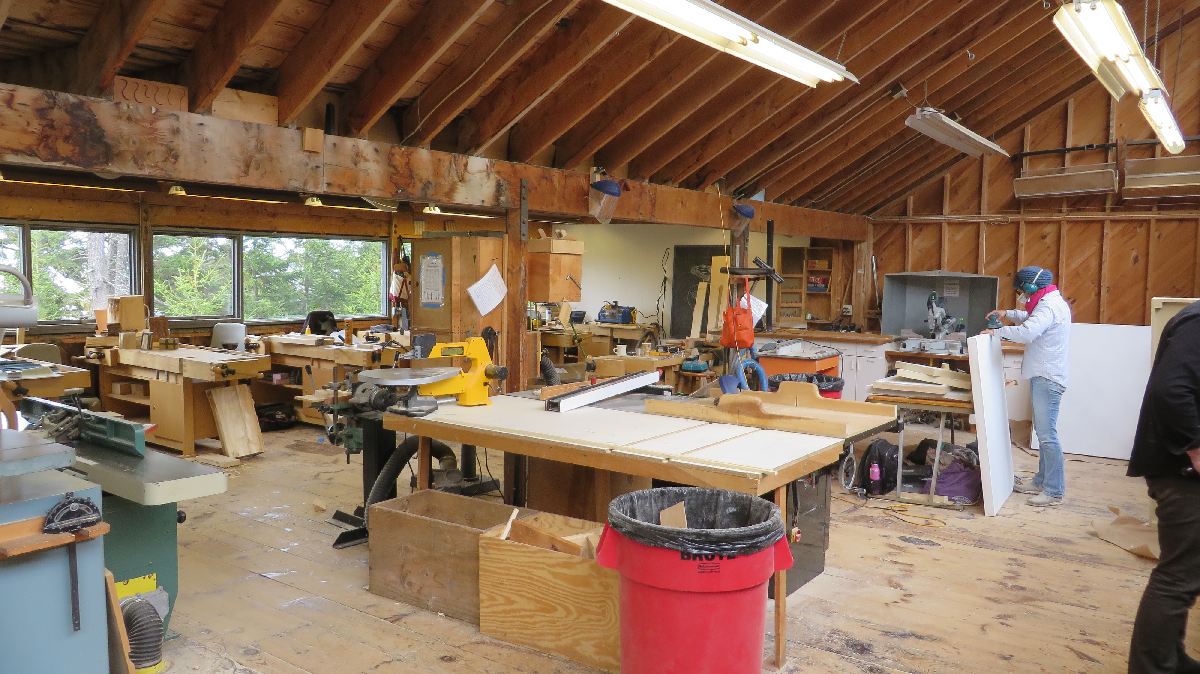
Handibot at my bench in the back of the Haystack woodworking studio
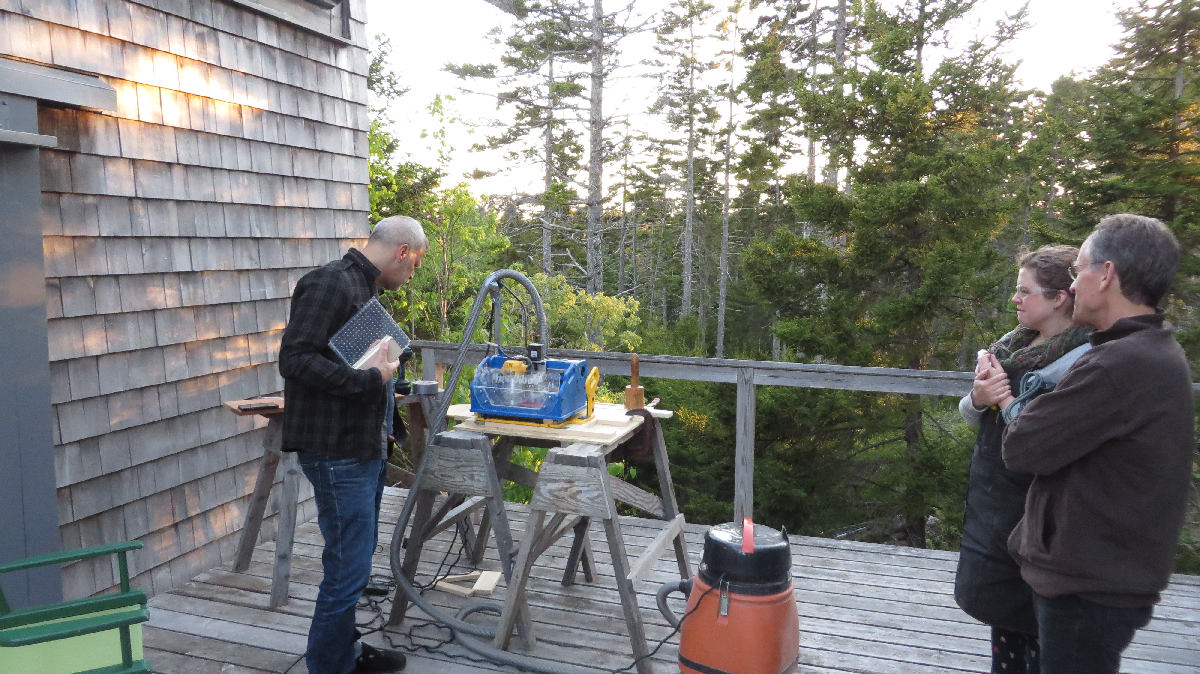
I often moved the Handibot outside the shop to work and to enjoy the weather
If I didn’t accomplish as much as I should have, it was because I spent way too much of my time in the being-on-the-water component of the work – collecting content and ideas for the carvings-paintings. If you know this part of Maine, you can probably appreciate the temptation of the spectacular water and boating. If not, here are just a few more views …
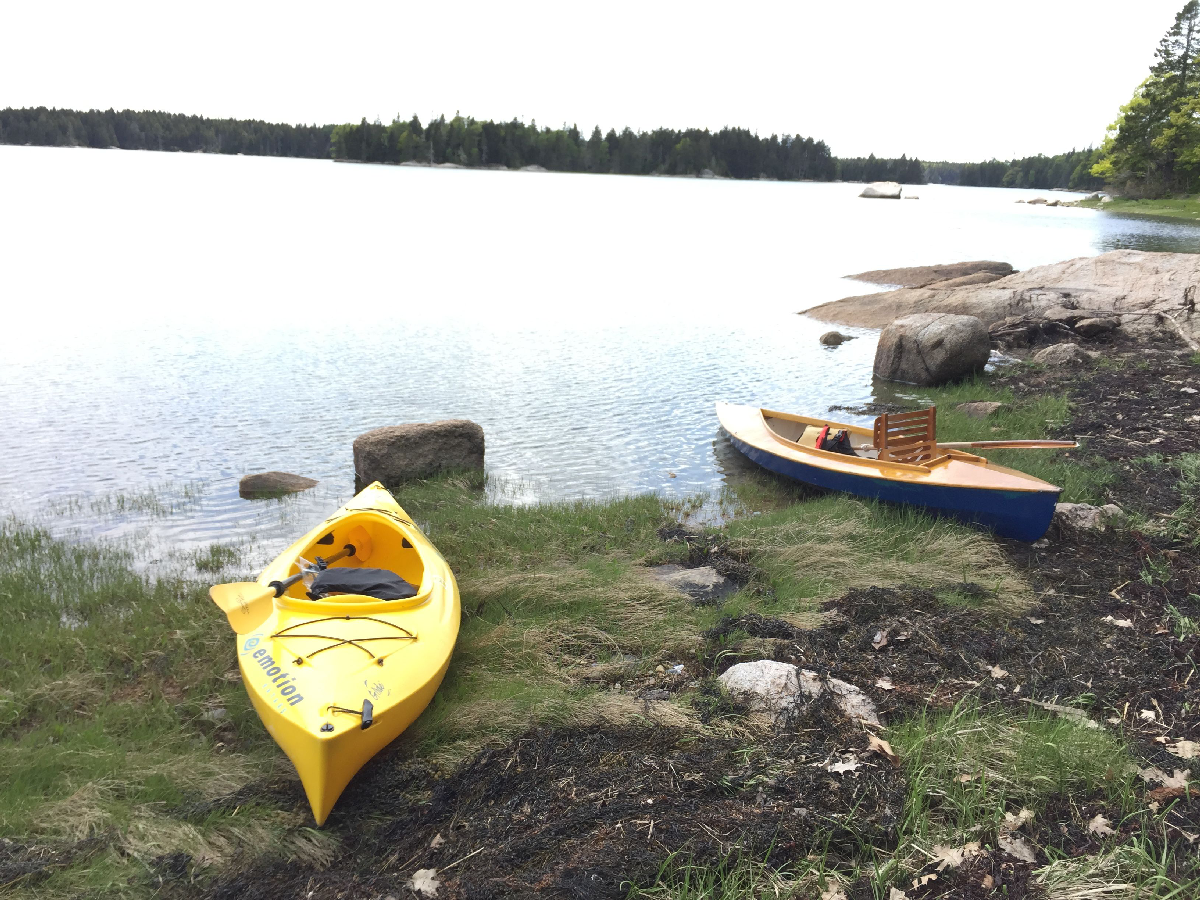
Scout, my kayak-like, decked-canoe on the right
My ‘kayak’ is actually a ShopBot-cut, decked-canoe, built by Bill Young and designed by Carl Stambaugh (Chesapeake Marine Design, Annapolis) and called a “Scout.” It’s like the touring canoes that were popular in the 19th century. I’ve added a spiffy little sail to it, made by a small company in Oregon (Kayaksailor), that pops up and down at the pull of a line. In the pictures here, I’ve included the type of views that I find appealing as my painting subject – combinations of water, shore, and sky. When I’m on the water, I try and do some drawing along with photography. I then use both as resources for developing carvings and color layouts.
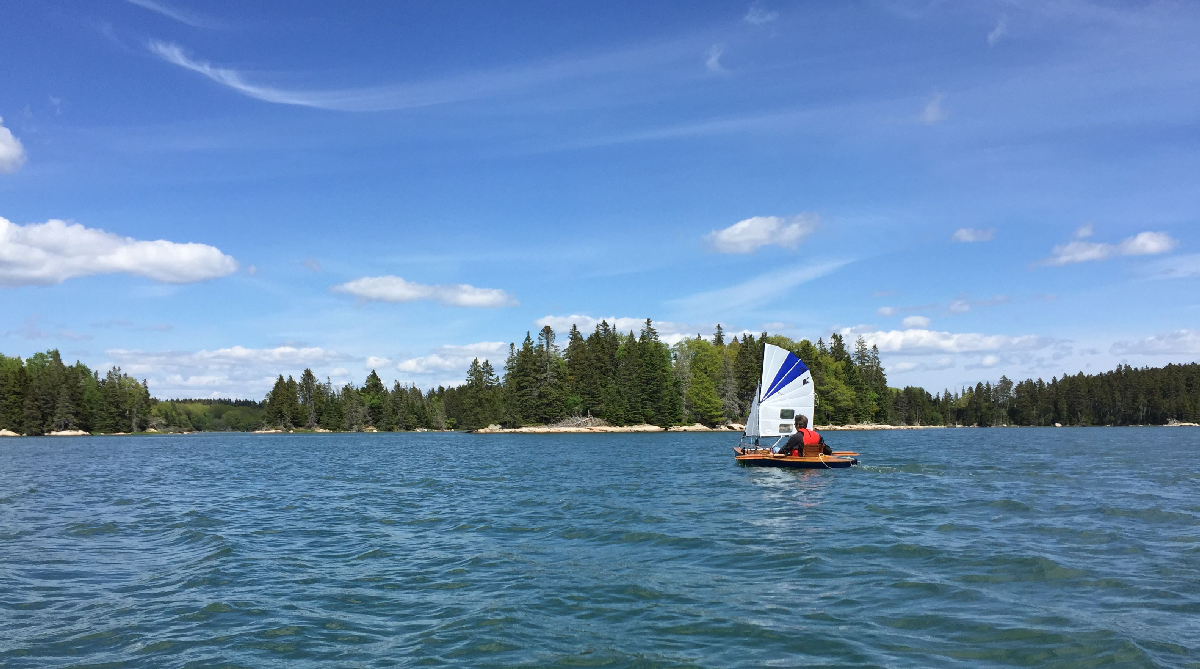
My Scout, decked-canoe under sail

Scout on the beach without rigging or gear
For those with an interest in Handibotting details, I provide more info on how I used the Handibot for carvings in a section below. For the moment, the general process was to put drawings and images into the background of an Aspire software project. Aspire is a 3D modeling and CAM program from the Vectric people who make V-Carve Pro. It is especially suited to this type of bas-relief work.
Using Aspire, my strategy was to abstract global contours to help suggest distance and textures (things like receding water-planes; shorelines in front of tree lines; etc) – then to draw/engrave on top of these contours with v-carving that had been derived from my drawings. The drawings were either scanned from the real drawings on the water, or were done after the fact, with a pressure-sensitive WAGO-type tablet so that they had varying width and character that would be represented by the v-carving. I like the idea of getting the textures of the drawing into the more global contours and features of the view. It has an engraving quality that captures paint in interesting ways during the painting process.
So I carved the bas-reliefs into wood panels with my Handibot – typically tiling over 3 panels (see more detail below). It was a two-stage process; first the general contours, then the carving work. Aspire allows the carving to follow the contours of the contours, a feature that was critical for my system.

Contour shape with vectors for v-carving (left), simulated contours (middle), simulated v-carving on contours (right)
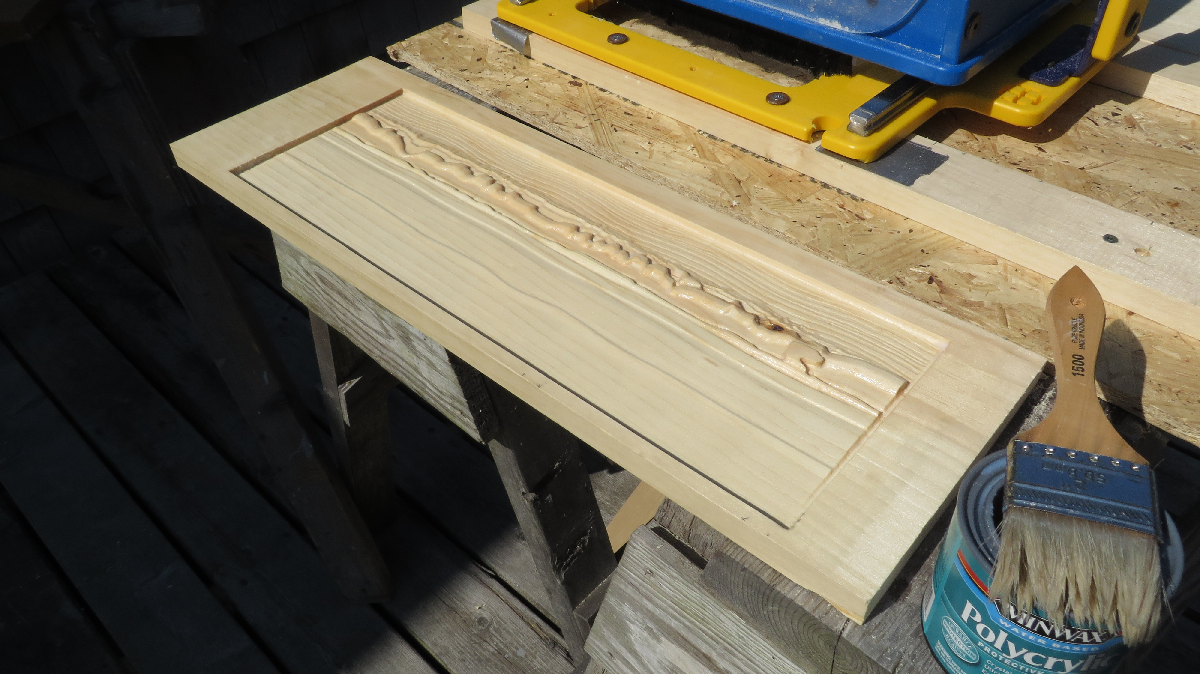
A tiled panel after carving contours for water-scape, just varnished and ready for v-carving
My plan, though I did not actually get to full production, was after doing some tests or “proofs” of a piece, to decide on a simplified painting strategy for each and to then produce a limited series or edition of say 10-20 similar “prints” – much as one would do in creating a numbered edition of traditional graphic prints. The method takes advantage of the ability to exactly reproduce the carved aspects of the work with digital machining similar to the way a flat piece is reproduced exactly with an engraved plate or block. The painting process might be viewed a little like the “inking” of plates for a multicolored print. To this point, I’ve just been experimenting with “proofs” and have not gotten to a production run.
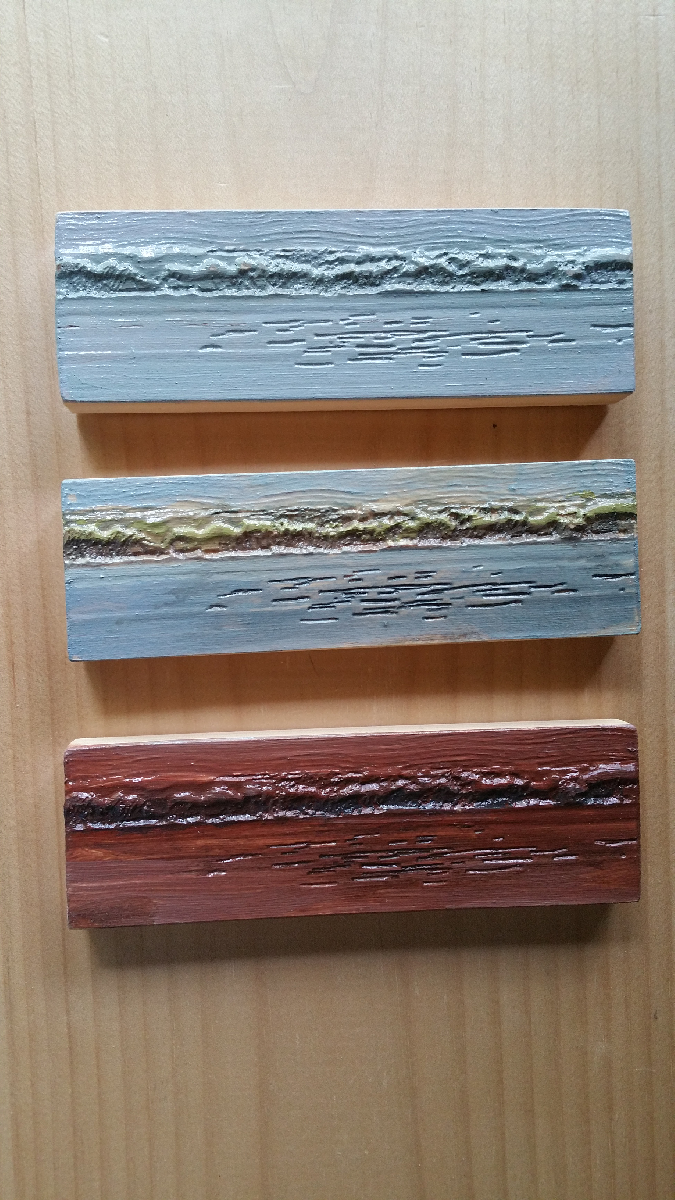
Three sample tests of colors for painting of the carvings
Of course, one of the powerful aspects of digital fab is that it is possible to make test versions of the work that are different sizes, or are in different materials, to test out things like coloring. Above is an image of multiple small versions of one of my pieces, colored 3 different ways to explore the overall coloring effect. I think I actually like some of this simplified painting more than some of the later larger pieces… but this is all part of exploring the technique.
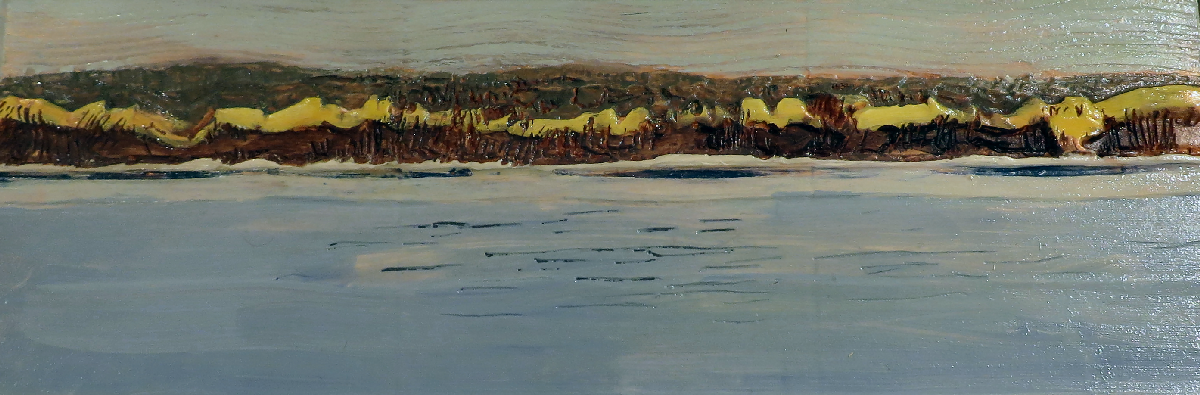
A final waterscape — Artist’s Proof
I find myself enjoying doing new kinds of things with digital technologies, but it is certainly possible for digital fabrication techniques to be used with more traditional art and craft forms too. I saw a lot of both going on at Haystack while I was there: printmaking, sculpture, bookmaking, weaving, and ceramics, just to name a few, as well as plenty of far-out stuff.
Handibotting Technique Details
The Handibot’s role in my project was to carry out the two stages of carving: the general contours followed by the v-carving of the drawing details. For most of this work, I wanted to work larger than the Handibot’s standard work area and decided I would use either 2 or 3 tile work areas (that is, pieces that would be about 8×12 or 8×18). I also experimented with carving the frame at the same time. Aspire automatically tiles these work areas, and creates the toolpaths.
In past Handibot projects, I’ve used both the Handibot large area jig and the (coming) “Crawler” to expand the size of my work area. Here, I kept things a little simpler. When it serves your needs, I’ve found that moving material under a Handibot that is in a fixed position is often an effective way to get good height matches over tiled panels in a larger piece. Since my work area would be just one Handibot “row” (or 1 – 8″ Y height) rather than moving the Handibot to produce the tiles, I decided to slide the board under the Handibot from one tile position to the next.
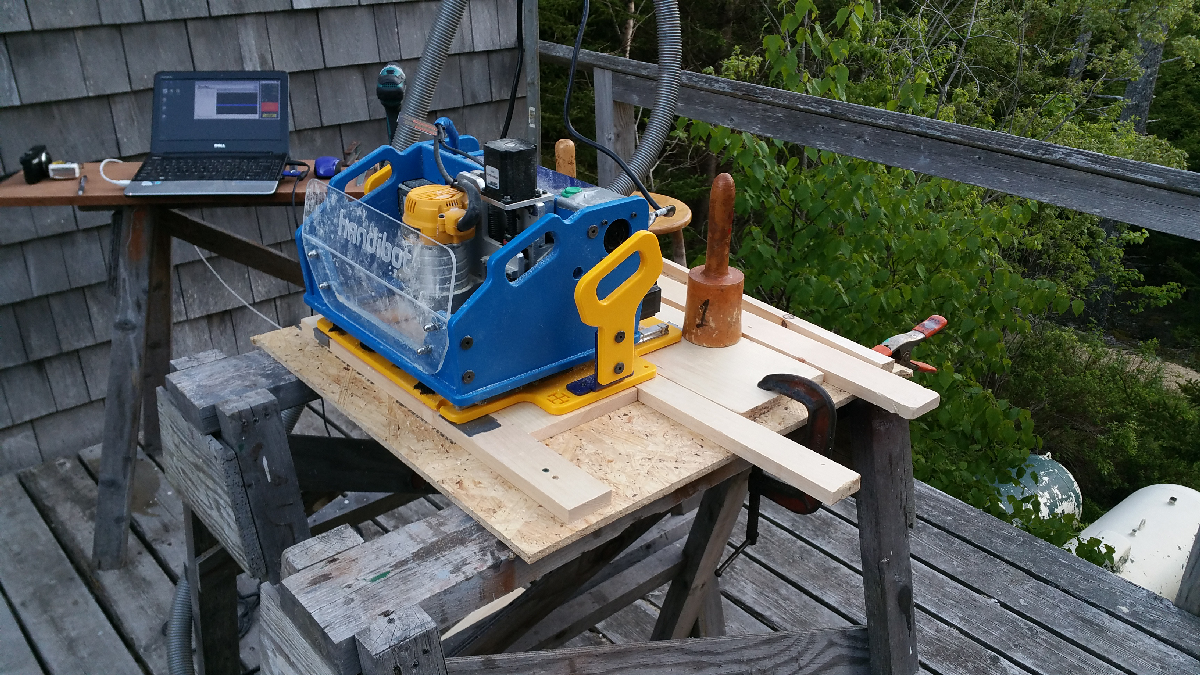
Handibot set up for tiling. Note project material against lower fence, clamped with wedge at top
For the set-up, I used boards the same thickness as my carving material. I screwed one board down to provide a fence at the bottom edge of the Handibot and at the top I clamped a tapered fence that would be used with a tapered wedge to lock the material in place. I put a 2-thickness, duct-tape shim under all four corners of the Handibot to give it just a little clearance over the material, aligned the Handibot exactly to the front of the jig, and screwed it down.
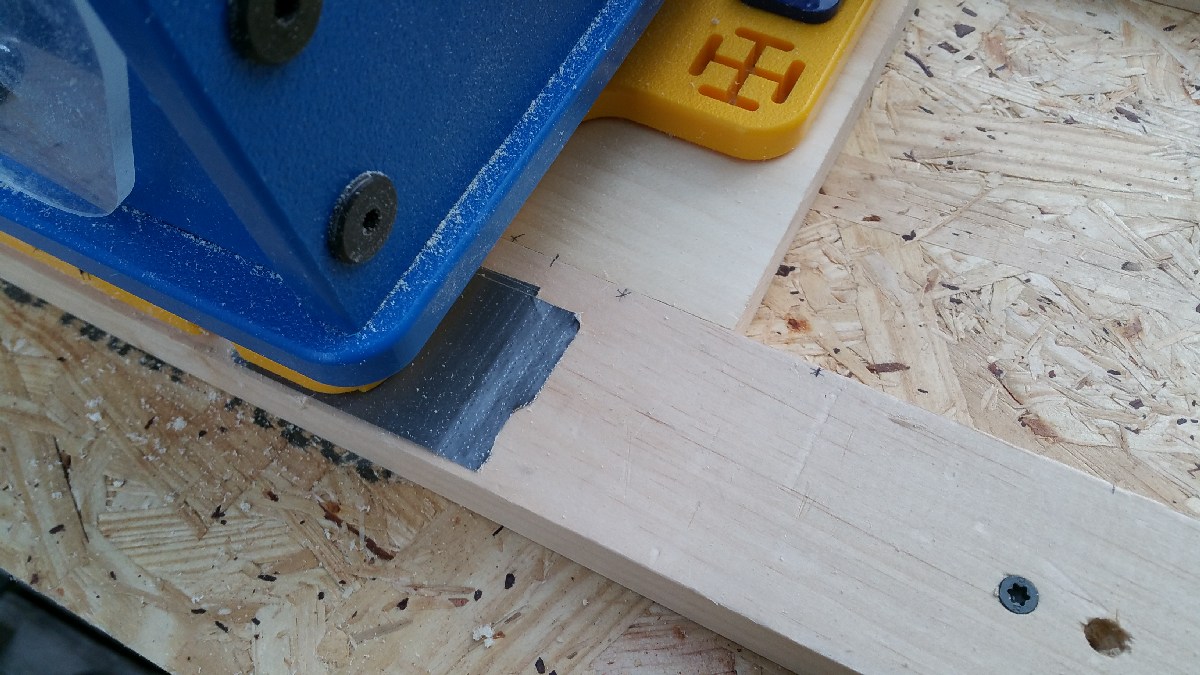
Positioning locations measured and marked with sharp pencil.
I used a sharp pencil to mark the bottom fence and to mark the material at exact 6″ intervals that would be used for moving between tiles. With a little attention to making sure the material is held down flat in the fixture, this technique works well for tiling with the Handibot and requires no special equipment (though I liked my mallet for tightening the wedge).

Steps: image on water, design in Aspire, carving and painting
I used a tapered ball nose cutter for the general carving and a 90deg v-bit for the v-carving work. In most cases, I varnished/sealed after the contour cuts and before doing the v-carving to sharpen the edges of the cuts. After carving and v-carving, I varnished the boards to further seal them and ready them for painting.
As a side note, I have found that in Aspire it is best to tile the exact size working-panel intended. While it is supported in Aspire, overlapping panels does not improve the quality of the tile match-ups for me – and it sometimes adds confusion in dealing with the overlap math.
Automated Production of a Souvenir
Design of souvenir engravings for “Residency” participants (in V-Carve Pro)
I wanted to give everyone in the “Residency” a little souvenir. I created a carving of the Haystack Logo and added lettering about the event to cut onto 1″x3″ stock for everyone.
That would be about 30 repeated items, so I created a routine (using the OpenSBP programming language) that would automatically feed a long 1×3 through my Handibot as it produced the souvenirs. Here’s the type of file that you might use to turn the router on and off and push the board around. Note that a loop is created with a label (“Start:”) and GOTO to run the file over and over. You just hit Stop when you get to the end of your material and are ready to end the cutting.
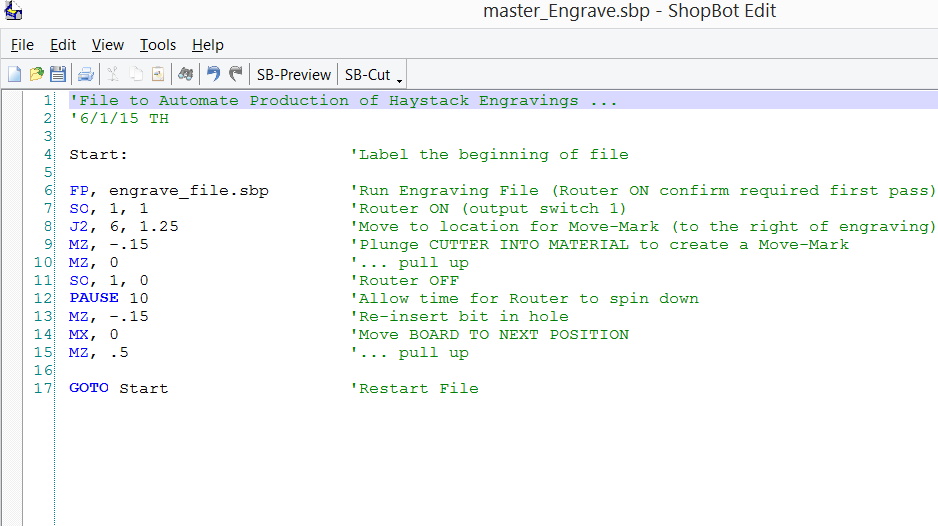
Example of the type file SBP file that can be used to repeatedly move material as in the video below
I set this up similar to the jig above, except in this case, instead of the firm wedge, I clamped a wood spring piece as the back fence and an additional wood spring to hold the 1×3 down as it moved through. Here’s a little video: