Project: Handibot Laser Sight
by Brian Owen • August 5, 2014 • Handibot Labs
Shopbot 3 software allows the user to quickly cut holes, rectangles and arcs with a few key presses, without the need for toolpathing in a program like Vcarve. Rather than carrying around a whole set of drill bit sizes, your Handibot can be used to cut out any size hole as well as more complex slots. In order to make this process even faster we have been working on a laser sight that snaps onto the Handibot router body and projects a cross at the center point of the tool axis.
We thought we’d share our idea with Handibot users and provide some brief instructions for those who would like to make their own laser sight. (Note: We’ve made the Handibot Laser Sight a full fledged product available at the Handibot Store)
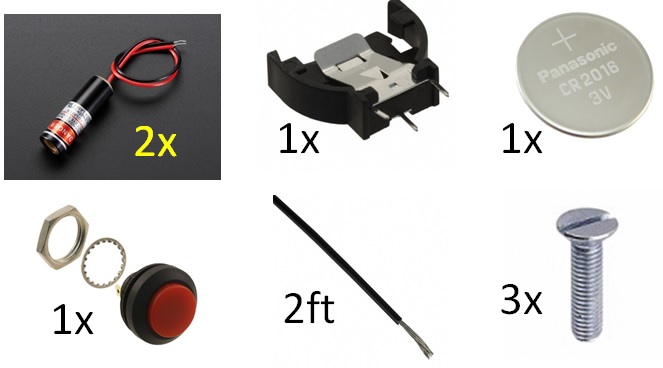
Materials Required:
| Part | Quantity |
| 5mW line lasers, Adafruit http://www.adafruit.com/products/1057 | 2 |
| Coin battery holder, Digikey BS-5-ND http://www.digikey.com/product-search/en?x=22&y=20&lang=en&site=us&keywords=BS-5-ND | 1 |
| 3V coin battery, Digikey P138-ND http://www.digikey.com/product-detail/en/CR-2016%2FBN/P138-ND/6681 | 1 |
| SPST switch, Digikey CW158-ND http://www.digikey.com/product-search/en?KeyWords=CW158-ND&WT.z_header=search_go | 1 |
| 8-32 Flat Head Screws | 3 |
| 24 awg wire (preferably) | 2ft |
| 5×10” piece of ½” HDPE or other easily machinable plastic | 1 |
Machining Plastic Case:
You can cut both halves of the case using an 1/8” bit on your handibot. Toolpath files can be downloaded here: Handibot Laser Bracket Toolpath
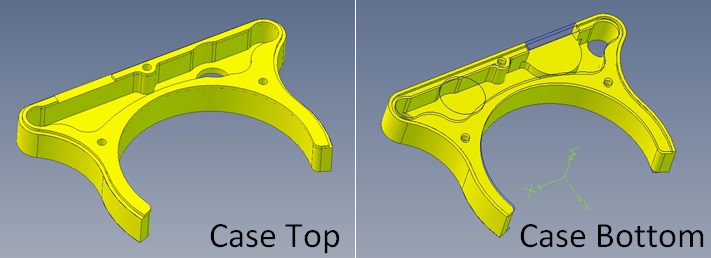
Once the parts are cut and the tabs cut off from the edges, use a countersink bit to recess the screw holes on the bottom of the case. The holes in the top half of the cover should be tapped for an M4 screw.
To fit the battery holder into the case you’ll need to clip two of its leads shorter using some wire cutters. When wiring up the lasers leave a generous length of wire between each part; it will make assembly much easier and there is plenty of space inside the case to tuck the extra wire when it is finally assembled.
Wiring the Lasers:
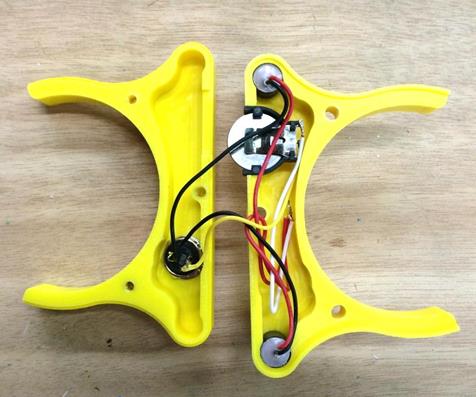
The lasers are diodes so the polarity of the power source does matter. You’ll want to solder the red wires from the lasers to the positive terminal of the battery (if you’ve wired it backwards and are only scanning this post now to troubleshoot—just flip the battery over in its holder). Solder another length of wire to the negative terminal on your battery holder. Pull the negative wire and the two black wires from the lasers through the button hole in the top half of the case; be sure to slide the lock nut for the button over the wires before you solder them! Solder the negative wire to one side of the switch and the black laser wires to the other. Pull the switch into its mounting hole and tighten the lock nut onto its base.
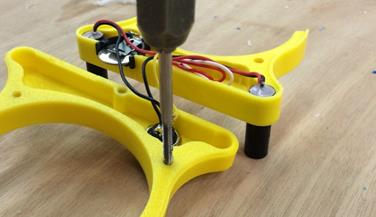
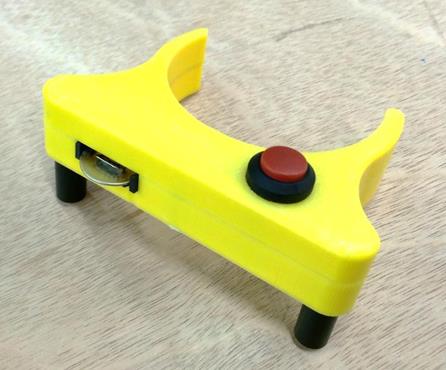
Secure the battery holder with a drop of super glue on its base. Press the lasers into the bottom half of the case until the top, sealed edge of the laser is in line with the edge of the hole, don’t worry about lining them up into a perfect cross now; you’ll do that later on your Handibot. With everything in place, carefully tuck your wires into the case and snap it closed. Insert the three screws into the bottom of the case to secure the assembly.
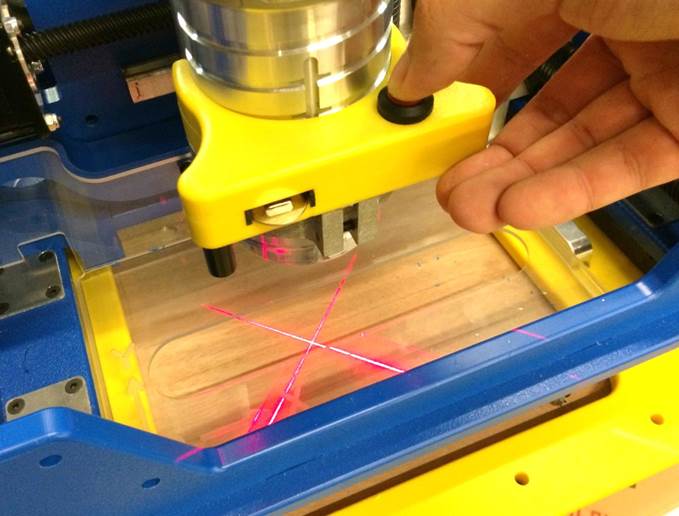
Aligning Your Lasers:
To align your lasers snap the laser sight onto your Handibot. Insert a sharp tipped tool such as a V-bit into the router collet. Place the Handibot on a level surface and move the z-axis down until your bit makes contact with the surface. Either mark this location with a pencil or leave a mark with the bit. Raise the router up again, being careful not to move the Handibot as this will affect your alignment. Press the red button on your laser sight to turn on the line lasers. Rotate the lasers by hand until their lines form a cross with its intersection directly over the mark you made on the surface below. The fit for the lasers is snug, however the lasers can be further secured in position with a drop of super glue.
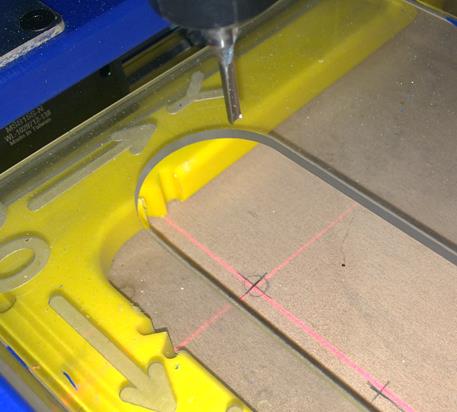
You can now more easily use your Handibot to cut holes and slots without the need for toolpathing or bit changes. In the example shown below, the hole pattern for a mounting flange is traced onto a surface.
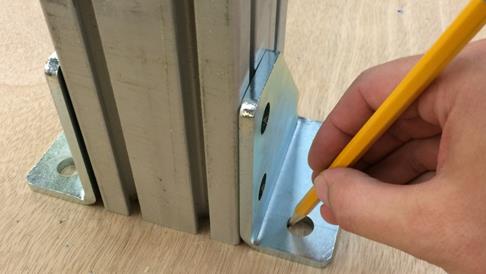
The laser sight is then used to align the bit with the sketched hole locations.