Getting Started With a New Material
by Anthony Wong • November 18, 2015 • How To
I feel like the issue of getting started with a new material comes up a lot, so I thought it might be useful to share some of my experiences. Recently, I was handed the files for the Styrofoam packaging that we use for some of the Handibot accessories and asked to get them to cut on a Desktop MAX (a new tool of ShopBot’s that is in the final production stages) instead of the 4’x8’ gantry tool that they were originally created for. Unfortunately, I have no experience cutting Styrofoam, and the bit we were using had broken and was discarded, so I didn’t even have a bit. How does one start cutting a new material? What do I fill into those fields in VCarve Pro to get started toolpathing? It can feel a bit intimidating, but with a little time and scrap material, it’s pretty straightforward.
The first place to start is to find an appropriate bit. One of the key issues for this cut is that the stock material is 2” thick Styrofoam. Normally, I would have tried cutting it with something I had around the shop to see if I could make do with what we have, but we don’t have too many bits that long just lying around. I perused some catalogs and not immediately finding anything to suit me needs, I called Onsrud’s technical sales folks. It turns out that they have specialized long bits for cutting thick foam. I guess I’m not the only person trying to do this.
Next, I looked up Onsrud’s chip load information. Here’s the sheet for their specialty bits.
I was using a 52-550 series cutter with a ¼” diameter which, according to the table, has a recommended chip load of .004-.006”/tooth. In the upper right corner there’s a note that says these values are for a depth of cut equal to the tool diameter. Going deeper than that (which I planned to do), they recommend reducing the chip load. Looking down at the bottom of the specialty bit sheet, we see formulas for calculating feeds and speeds. In reality they are all the same equation, but solved for different variables. I typically run my spindle at 18,000RPM. This cutter has 2 flutes. For a depth of cut of .75” (3 times the cutter diameter), the recommended chip load is .003”/tooth. When I throw all three of these pieces of information into the equation for a feed rate, I get 108 inch/minute, or 1.8 inch/second (IPS).
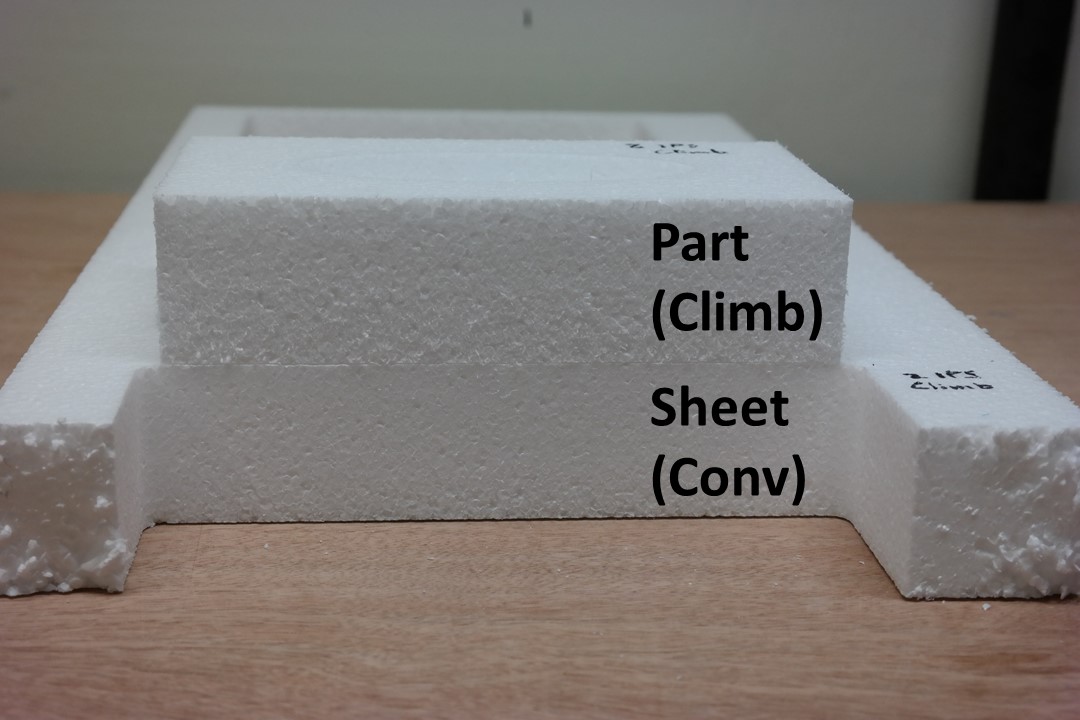
I then had a starting point of .75” depth of cut, 18,000 RPM spindle speed, and 1.8 IPS feed rate. I wanted to push things a little and created a toolpath for a part with 1” depth of cut and 2 IPS feed rate. Here’s a picture of a test part which has a simple pocket and profile cut. I had cut this first part in the climb cutting direction. It turns out that when cutting a profile, the bulk material sees the opposite cutting direction than the part. In this case, the Styrofoam sheet has a profile cut in the conventional direction. Looking at the outside of the part versus the inside of the sheet in the picture below, I see that my part has the worse finish, which means I guessed wrong and that conventional cutting yields better results.
Next I wanted to see how far I could push the feed rate. For production parts, I like to crank them out as quick as possible, so I cut out 3 more test pieces all in the conventional direction, but at 2 IPS, 3 IPS, and 4 IPS feed rate. Looking at the edges, I saw that the cut quality decreases a bit with increasing feed rate in the profile cuts. Given that this is Styrofoam being used for packaging material, 4IPS looks fine. For future reference, I also know that if I want a really smooth surface, I need to slow down to 2IPS.
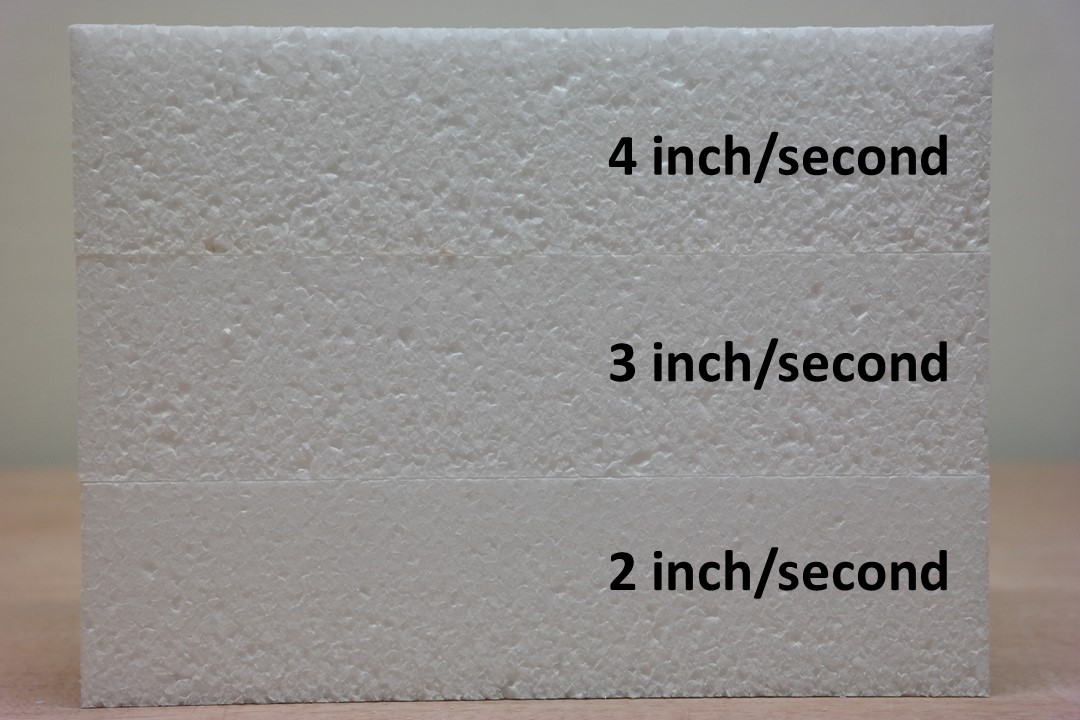
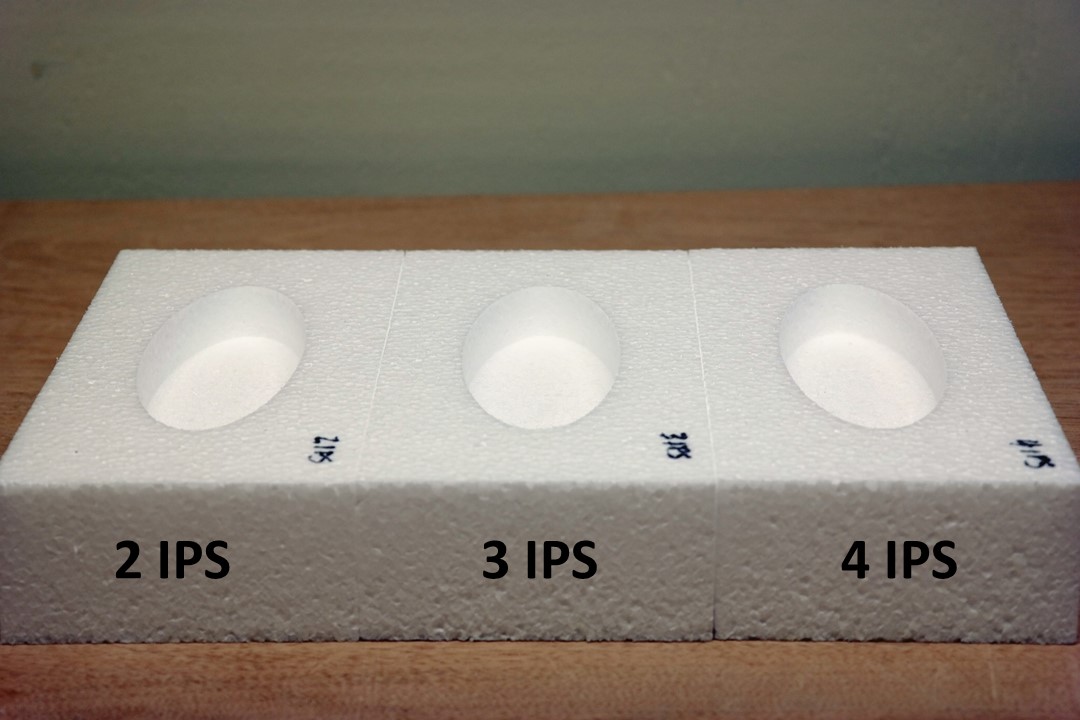
Interestingly, the cut quality looks better in the oval pocket cuts. This makes me think that the quality of the finish might be getting worse as the feed rate increases because the tool cannot eject the chips from the kerf fast enough. In a pocketing toolpath, the dust collection is able to suck the chips out and it appears to be less of an issue.
To summarize, here’s what I do when I need to cut something totally new:
- Consult a bit vendor for a bit recommendation
- Calculate the feed rate based on the manufacturer’s recommendations
- Test cut a profile cut to determine climb or conventional cut direction
- Test cut at various speeds to find the optimal cutting speed
Happy cutting!