Utilizing Scrap Material
by Anthony Wong • December 9, 2015 • Projects

The other day I was looking for some scrap material to use for some stocking stuffers I wanted to make. While I was poking around, I noticed we had some junky old pallets piling up at our loading dock that I’ve been meaning to get rid of. The Handibot’s portability made it the perfect tool for cutting these pallets. Whereas with most other CNC tools I’d have to pull the pallet apart, get all the nails out, and then figure out some way to hold it down, all I had to do with the Handibot was put it down on top of the pallet.
If you’re going to try making a project out of a pallet, I would try to avoid V-Carving. Since this is beat up wood, it is very unlikely that you will be able to get the material to be flat and parallel to the Handibot’s XY plane, so V-Carved lettering might look extra bold in the high spots and fine or illegible in the low spots. In this case, I pocketed the lettering instead. Also be prepared to mess around with your Z depth. Since the material isn’t supported along its entire length, it has some flex and the material thickness varies widely from board to board. I measured thicknesses from .5-.75″ on the same pallet. This is important because if you use tabs to suspend your parts, you’ll want to update your toolpaths for each thickness.
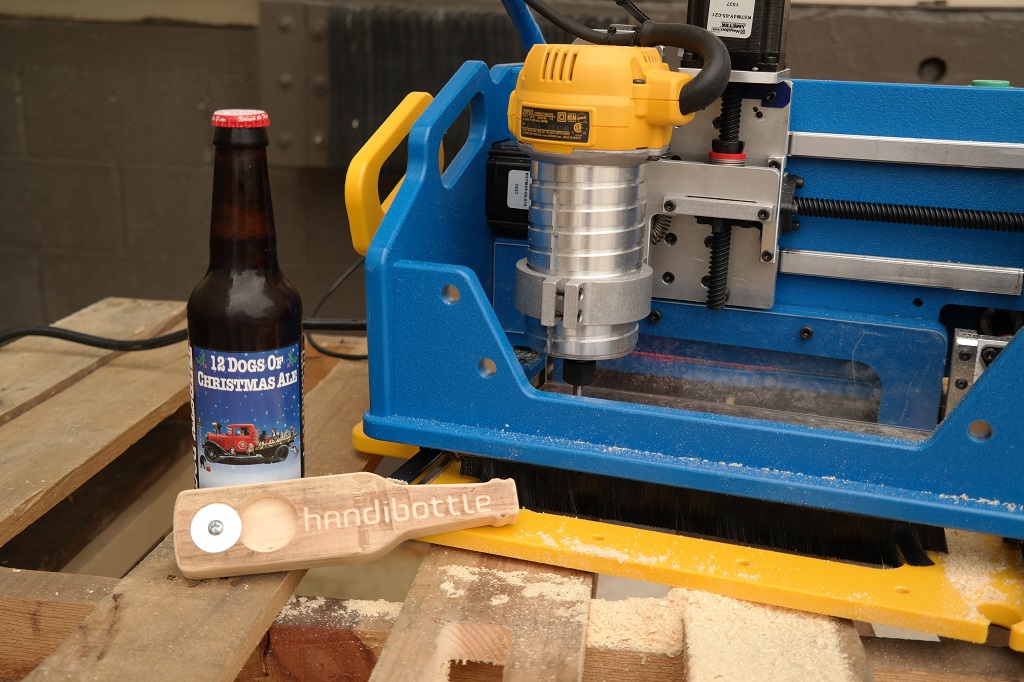
What I made is a bottle opener made of the scrap material in the shop. First, I pocket the logo and centerdrill where the screw will go. I created the toolpaths with a 1/16″ end mill. Those are pretty hard to find with a 1/4″ shank, so I decreased the stepover and cut with a 1/16″ tapered ballnose (Onsrud PCL583659). Pocketing with a ballnose instead of a square endmill leaves some scalloping, but with small letters, it’s hardly noticeable. Next, I switched to a 1/4″ straight bit (Onsrud 48-005) and cut the recess for the washer and the bottle. Finally, I cut the outline with the tabs. After the Handibot was done cutting, I knocked the part out and rounded over all the edges at a router table and lightly sanded it in a couple rough places. Then I put the screw and washer in, and that was it. Time to crack open a beer and enjoy!
If you want to make one of your own, I’ve uploaded the VCarve file here. It’s really simple. In addition to the scrap wood, you’ll also need a short screw and a large washer. That’s it. You’ll want to modify the diameter of the recess for the washer to match what size washer you have. You’ll also need to move the washer recess so that the washer overhangs and catches the bottle cap. I’ve found that an overlap of .15″ works pretty well. Move the center drill as well. I find the center drill helps with getting the washer in the right place. Don’t forget to update the thickness of the material and the depth of cut of the profile of the cutout in your file.